When October arrives, I always feel a pull toward playful food that makes everyone smile.
Halloween has a way of turning the ordinary into pure fun, and these mini mummy pizzas are the proof.
The first time I placed a tray of them on the table, I didn’t even have to say a word—every pair of eyes locked on them instantly.
The kids giggled, the adults reached for them just as quickly, and before I knew it, the whole plate was gone.
What I love most is how the mummies look like little characters coming alive on the tray.
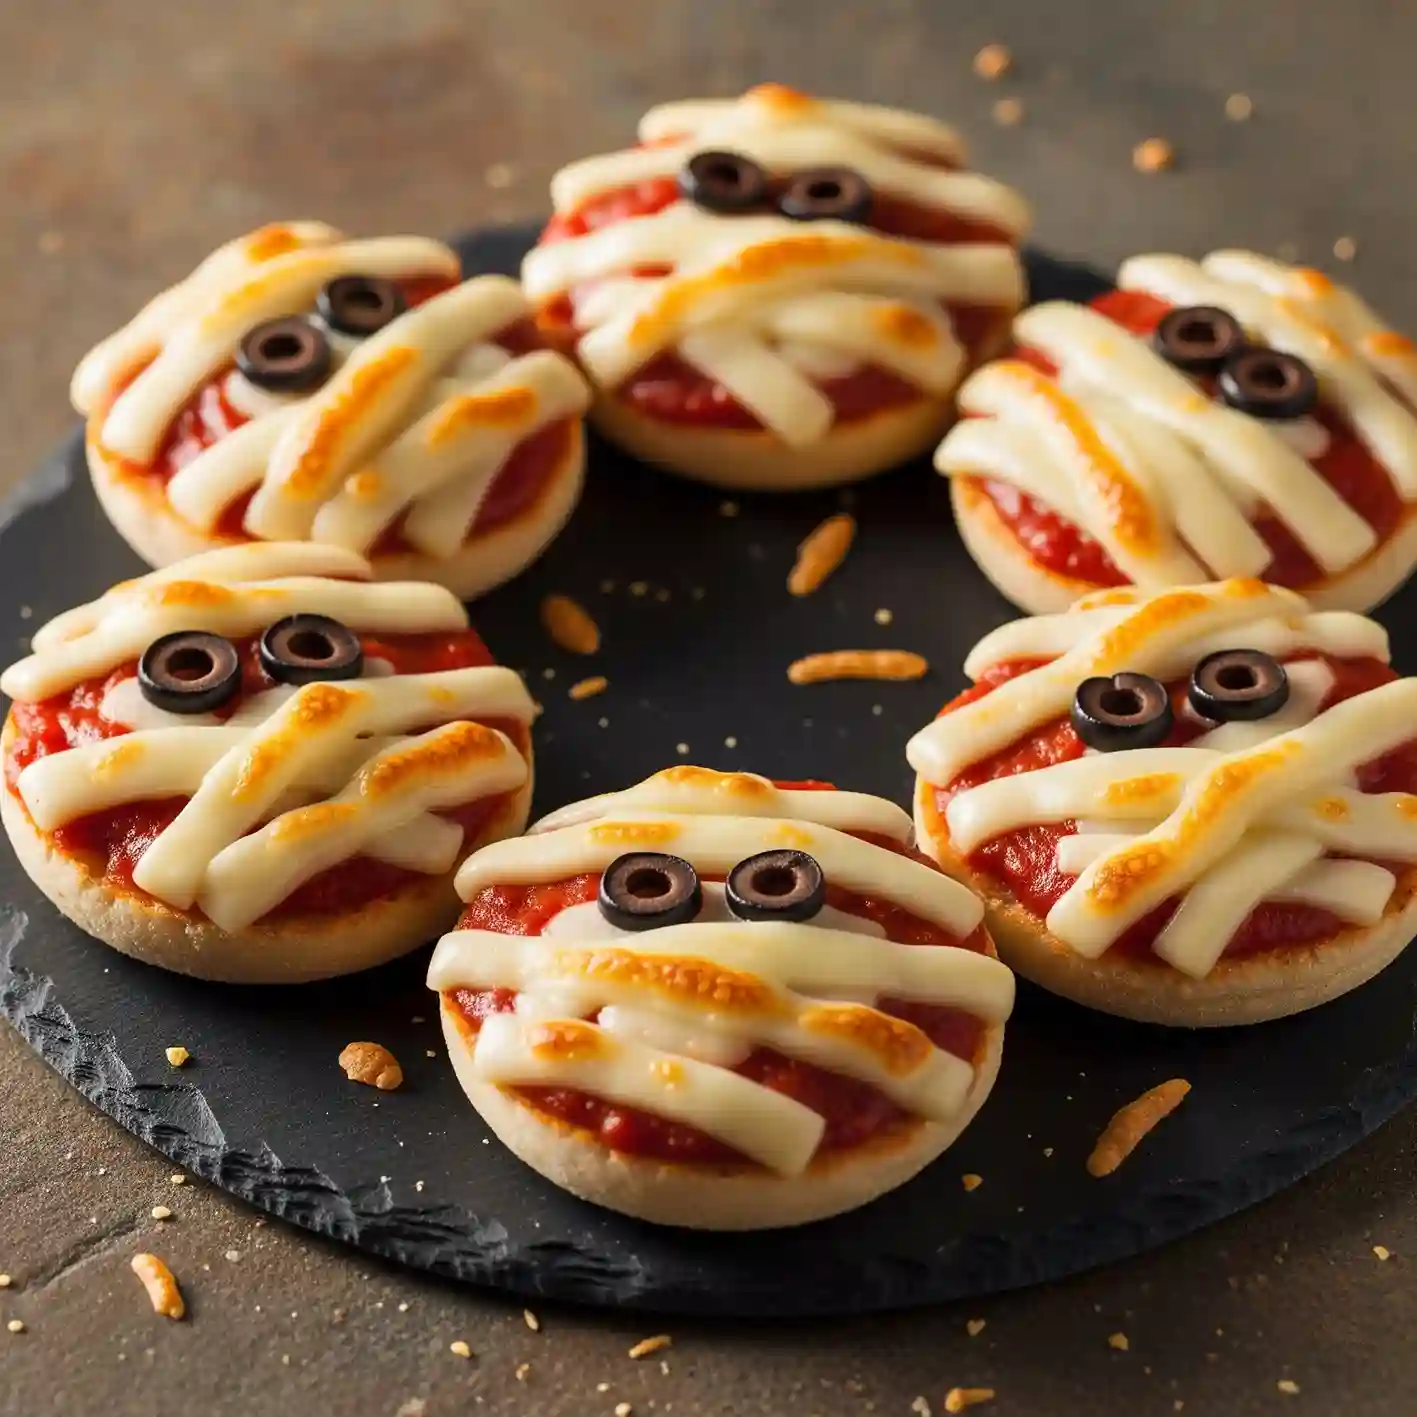
The crisscrossed cheese strips form their bandages, the olives peer out like wide eyes, and the bubbling sauce beneath gives them just the right amount of personality.
They’re playful enough for a party, yet satisfying enough to count as a meal. These mini mummy pizzas don’t just fill hungry stomachs—they create a moment.
A moment where everyone gathers closer, laughs a little louder, and forgets about everything else except enjoying the food in front of them. And that’s what Halloween nights should feel like.
Halloween Mini Mummy Pizzas Recipe
Ingredients
- 1 pack of mini pizza bases or small round flatbreads (about 3 to 4 inches each)
- 1 cup pizza sauce or marinara sauce
- 1 ½ cups mozzarella cheese, cut into thin strips
- 12 to 14 black olive slices (for the eyes)
- 1 teaspoon dried oregano (optional)
- 1 teaspoon olive oil (for brushing)
Instructions
- Preheat the oven to 190°C (375°F) and line a baking tray with parchment paper.
- Arrange the mini pizza bases on the tray and lightly brush the tops with olive oil to prevent them from getting soggy.
- Spread a spoonful of pizza sauce evenly over each base, making sure to cover right to the edges.
- Sprinkle a light pinch of oregano over the sauce for extra flavor if desired.
- Place the mozzarella strips across each pizza in crisscross patterns to mimic mummy bandages. Leave small gaps so the sauce peeks through.
- Add two olive slices near the top of each pizza to make the mummy eyes. Press them slightly into the cheese so they stay in place.
- Bake in the preheated oven for 8 to 10 minutes, or until the cheese is melted and starting to turn golden in spots.
- Remove from the oven and allow to cool for a couple of minutes before serving warm.

What Are Halloween Mini Mummy Pizzas?
Halloween mini mummy pizzas are small, round pizzas decorated to look like little mummies with melted cheese bandages and olive eyes. They are fun, delicious, and designed to bring excitement to Halloween gatherings.
These mini pizzas are not just for kids—they are enjoyed by adults too because they look unique and taste just as good as regular pizzas, only with a playful twist.
Can I Make Halloween Mini Mummy Pizzas Ahead Of Time?
Yes, you can prepare parts of the recipe ahead of time, which is helpful if you are planning for a party.
- Prepare the bases in advance: Spread sauce on the pizza bases, cover them tightly with cling film, and refrigerate them for a few hours before baking.
- Cheese strips and olives: Slice the cheese and olives earlier in the day, store them in airtight containers, and assemble the pizzas right before baking.
- Fully baked pizzas: You can also bake the pizzas a few hours ahead and reheat them in the oven at 180°C for 5 to 7 minutes before serving to keep them warm and fresh.
What Toppings Can I Use For Mummy Pizzas?
The classic design uses mozzarella strips and black olives, but you can add small extras for flavor without losing the mummy look.
- Add protein: Place thin slices of chicken, turkey pepperoni, or minced meat under the cheese strips for a heartier bite.
- Vegetable boost: Hide small pieces of bell peppers, mushrooms, or sweet corn beneath the cheese to add extra taste and nutrition.
- Different cheese choices: Use cheddar, provolone, or a cheese mix along with mozzarella for richer flavor, while still keeping the mummy bandage effect.
How Do I Store Leftover Halloween Mini Mummy Pizzas?
Leftovers can be stored safely and enjoyed later if you store them properly.
- Refrigerator: Place the cooled pizzas in an airtight container or wrap them tightly in foil. They will stay fresh for up to 3 days.
- Freezer: If you want to save them for longer, freeze them in a single layer on a tray first, then transfer them to freezer bags. They will last for about 1 month.
How Do I Reheat Mini Mummy Pizzas?
Reheating them the right way makes a big difference in taste and texture.
- Oven method: Preheat the oven to 180°C, place the pizzas on a baking tray, and heat for 6 to 8 minutes until the cheese is melted again.
- Air fryer method: Heat them at 180°C for about 3 to 4 minutes for a crisp finish.
- Microwave method: Use only if you are short on time, heating for 30 to 40 seconds, though the crust may not be as crisp.
Can I Make Mummy Pizzas Without Ready-Made Pizza Bases?
Yes, you don’t always need store-bought bases. You can use several alternatives that work just as well.
- Homemade dough: Roll out small rounds of pizza dough if you like baking from scratch.
- Bread slices: Cut out rounds from sandwich bread using a cookie cutter for quick and easy bases.
- Tortillas or pita bread: Both can be cut into circles and used as lighter, thinner bases for the pizzas.
Are Mini Mummy Pizzas Good For Kids’ Lunchboxes?
These pizzas are not only fun for parties but also work well as a lunchbox surprise.
Pack them once they are cooled to room temperature so condensation doesn’t make them soggy.
Wrap them in foil or place them in a sealed container, and they will stay fresh until lunchtime.
Kids love the playful mummy face, and parents appreciate that these mini pizzas can be a filling and balanced meal.
Tips And Tricks For Making Halloween Mini Mummy Pizzas Look Perfect
Creating Halloween Mini Mummy Pizzas is all about the fun design, and a few small tricks can make them look extra neat and eye-catching. Here are some helpful tips to get the bandages and eyes just right.
- Cut cheese into even strips: Use a sharp knife or a pizza cutter to slice mozzarella into thin, even pieces. This helps the bandages look neat and uniform once melted.
- Leave small gaps: When placing cheese strips, don’t cover the sauce completely. Leaving little red spaces peeking through makes the mummy design stand out better.
- Press the eyes lightly into place: When adding olive slices for eyes, press them gently into the cheese so they don’t slide off during baking.
- Vary the cheese angles: Place some strips diagonally and others straight across to create a natural, wrapped-up look.
- Avoid overbaking: Keep an eye on the oven—too much baking time can make the cheese turn brown and lose the mummy effect. Remove them as soon as the cheese melts and gets slightly golden in spots.
- Serve warm for best look: The bandages hold their shape best when served fresh from the oven. If reheating, use the oven or air fryer to bring back the texture instead of the microwave.
Fun Ways To Serve Halloween Mini Mummy Pizzas At A Party
Halloween Mini Mummy Pizzas can be the star of any party table if they are served in creative ways. Presentation adds excitement, especially when kids and guests see the fun details. Here are some playful serving ideas to try.
- Arrange in a circle: Place the mini pizzas in a ring shape on a large platter so it looks like the mummies are gathered together. This instantly grabs attention.
- Use a dark tray or board: Serving on a black or slate tray makes the white cheese bandages and red sauce stand out more.
- Add a spooky background: Surround the platter with small decorations like plastic spiders, fake cobwebs, or tiny pumpkins for a Halloween touch.
- Serve with dipping sauces: Place small bowls of garlic sauce, chili dip, or ranch dressing around the platter. Kids especially enjoy dipping their mummies.
- Mix with other themed snacks: Combine the mummy pizzas with Halloween-shaped cookies, monster cupcakes, or pumpkin-shaped fruits to create a full themed snack table.
- Label with fun names: Add a small sign next to the platter with a playful label like “Hungry Mummies” to make guests smile.
You May Also Like To Check Out These Recipes
- Crustless Pumpkin Pie
- Pumpkin Cream Cheese Muffins
- Baked Cinnamon Apples
- Oven Roasted Sweet Potatoes Wedges
- Roasted Sweet Potato Black Bean Bowl
- Pumpkin Pie Cookies
- Pumpkin Chocolate Chip Cookies
- Halloween Pumpkin Cake
- Creamy Pumpkin Soup With Roasted Seeds
- Soft & Fluffy Pumpkin Chocolate Chip Muffins
- Sweet Potato Casserole With Marshmallows
- Homemade Pumpkin Pie
- Decorated Pumpkin Shaped Cookies
- Mini Pumpkin Cheesecakes
- Pumpkin Cake With Cinnamon Cream Cheese Frosting
- Starbucks Pumpkin Cream Cheese Muffins
- Easy Tres Leches Cake With Box Mix
- Old-Fashioned Date Cake
- Funnel Cake
- Green Cake
- Vegan Apple Cake
- Delicious Sunset Cake
- Moist Plum Cake
- Under The Sea Cake With Ocean Decorations
- Jack Nightmare Before Christmas Cake
- Halloween Charcuterie Board
- Halloween Fruit Platter
- Halloween Veggie Tray
- Halloween Chocolate Bark
- Halloween Cookie Cake
- Halloween Graveyard Dirt Cake
- Halloween Eyeball Pizza
- No Bake Cheesecake Without Cream Cheese
- Halloween Cake Pops
- Halloween Chocolate Covered Strawberries
- Halloween Ghost Pizza
- Halloween Melted Witch Cake