I’ve always loved how Halloween brings out creativity in the kitchen. Costumes and decorations are fun, but the treats are what truly bring the celebration to life.
Every year, I look for desserts that feel playful yet still taste incredible, and chocolate covered strawberries have become my go-to canvas.
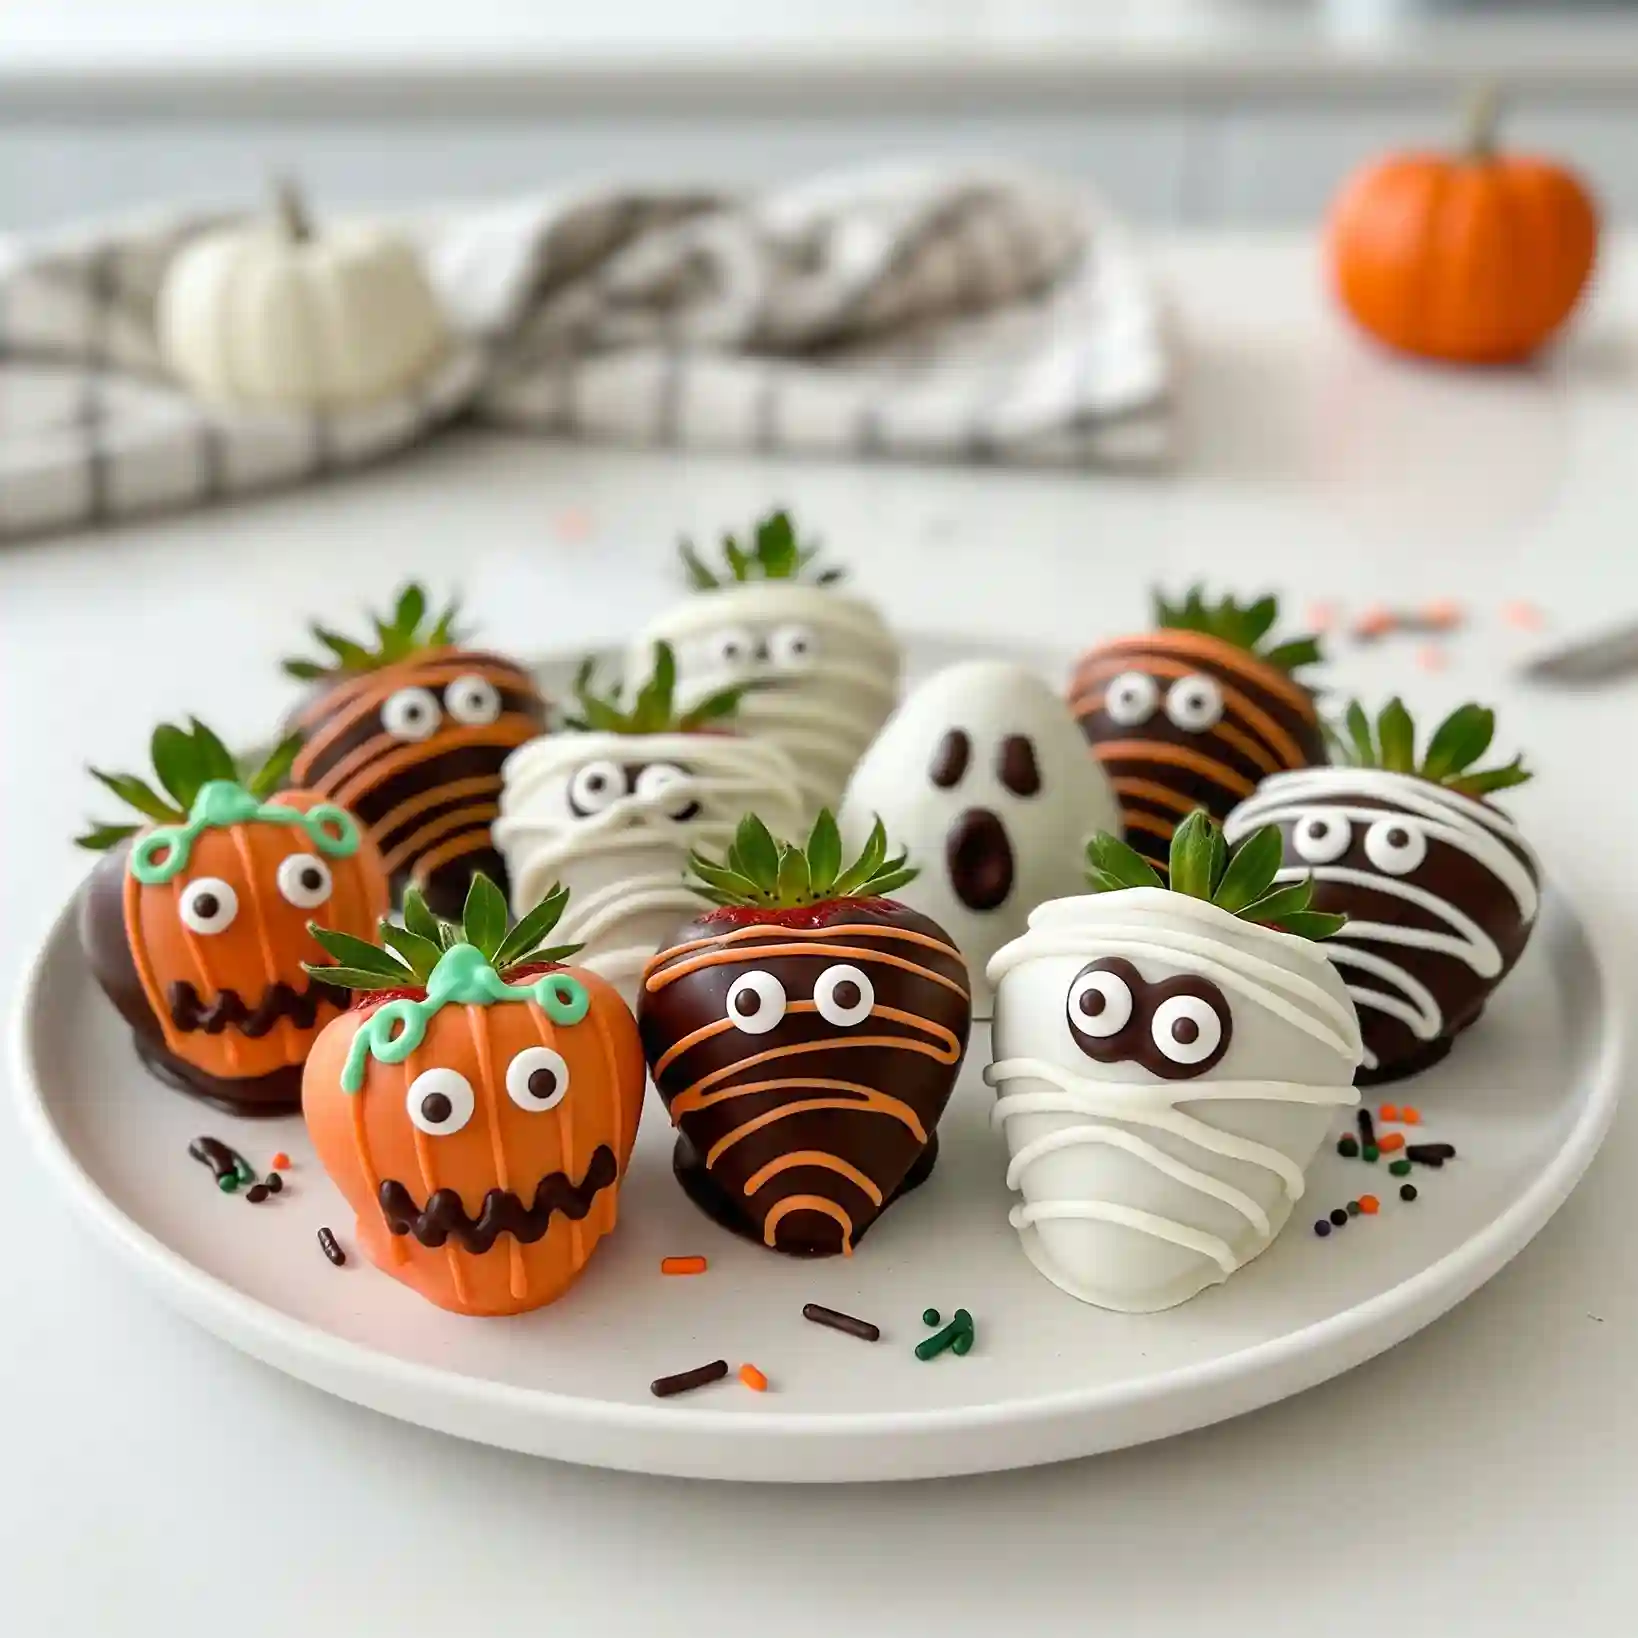
They start as simple fruit, but once dressed up as pumpkins, mummies, and ghosts, they instantly become the stars of the table.
The magic lies in the details—the smooth orange shells with tiny green vines that look just like little pumpkins, the white chocolate drizzle that wraps each strawberry like a mummy, and the wide-eyed ghosts that make kids laugh before they take a bite.
These aren’t just quick sweets thrown together; they’re made to be admired, shared, and enjoyed.
The best part is how much personality each strawberry takes on, even though they’re all made from the same basic steps.
Serving these feels like setting down a tray of edible characters. They look playful, taste rich and fruity, and disappear faster than you expect.
Every bite balances the freshness of the berry with the snap of chocolate, and no one can resist going back for another.
Halloween Chocolate Covered Strawberries Recipe
Ingredients
- 20 fresh strawberries with green tops intact
- 1 cup white chocolate or candy melts
- 1 cup milk chocolate or semi-sweet chocolate
- 1 cup orange candy melts
- 2 teaspoons coconut oil or vegetable shortening (optional, for smoother melting)
- Candy eyeballs (small and medium sizes)
- Green candy melts or green icing for pumpkin stems and vines
- Dark chocolate or black decorating gel for pumpkin mouths and ghost faces
- Small piping bags or zip-top bags
Instructions
- Wash the strawberries gently under cool water, pat them dry completely with a paper towel, and let them air dry for at least 10 minutes. Any moisture will prevent the chocolate from sticking properly.
- Prepare three separate microwave-safe bowls: one for white chocolate, one for milk chocolate, and one for orange candy melts. Melt each in the microwave in 20–30 second intervals, stirring well after each until smooth. Add a small amount of coconut oil if the chocolate seems too thick.
- For the pumpkin strawberries, dip several strawberries into the melted orange candy melts. Allow excess coating to drip off and place them on a parchment-lined tray. Before they set, attach two candy eyeballs to each. Once firm, pipe small green stems and vines at the top with melted green candy melts. Use dark chocolate or decorating gel to draw pumpkin mouths.
- For the mummy strawberries, dip a few strawberries into melted white chocolate. Stick on candy eyeballs before the coating sets. Once dry, drizzle thin lines of white chocolate across the strawberries using a piping bag to create the wrapped mummy effect.
- For the ghost strawberries, dip strawberries into white chocolate and let them set. Once dry, pipe or draw ghostly eyes and an open mouth using melted dark chocolate or decorating gel.
- For the spooky stripe strawberries, dip some strawberries into melted milk or dark chocolate. Drizzle thin lines of orange or white chocolate over the top for a striped pattern. Quickly add candy eyeballs before the drizzle hardens.
- Place the decorated strawberries on a tray lined with parchment paper and refrigerate them for at least 20 minutes, or until the chocolate is fully set.
- Once chilled, arrange them on a platter and serve immediately for best taste and appearance.

How Far In Advance Can I Make Halloween Chocolate Covered Strawberries?
You can prepare these strawberries a day before serving, but it’s important to store them properly so they don’t sweat or soften. The natural juice from the strawberries can cause the chocolate coating to loosen if kept too long.
- Best timeline: Make them no more than 24 hours ahead for the freshest taste and best look.
- Keep them chilled: Store them in the refrigerator once the chocolate has fully set.
- Avoid leaving out too long: At room temperature, they should only sit out for about 2 hours before the chocolate starts softening.
If you want them to look neat and glossy for a party, decorating and storing them the day before is the safest option.
How Do I Store Halloween Chocolate Covered Strawberries?
Storage makes a big difference in how long these strawberries last and how good they taste. They need a cool environment to keep the chocolate firm and the berries fresh.
- Refrigerator storage: Place them in a single layer on a tray or inside a shallow container lined with parchment paper. Cover them loosely with plastic wrap or a lid.
- Paper towel trick: Add a paper towel at the bottom of the container to absorb excess moisture, which keeps the chocolate from getting sticky.
- Avoid stacking: Do not place strawberries on top of each other, as this can ruin the decorations and cause them to stick together.
- Shelf life: Stored correctly, they will stay fresh for up to 2 days, but they taste best within the first 24 hours.
Can I Freeze Halloween Chocolate Covered Strawberries?
Freezing chocolate covered strawberries may sound tempting, but it usually doesn’t work well. Once thawed, the strawberries release water that makes the chocolate coating crack and the decorations smudge.
- Texture changes: The berry inside turns mushy when frozen and thawed, ruining the fresh bite.
- Decoration damage: Candy eyeballs, drizzle, and fine details will lose shape when condensation builds up.
If you want to prepare ahead, it’s better to make them fresh rather than freezing.
What Chocolate Works Best For Halloween Strawberries?
The type of chocolate you use has a big impact on how smooth the coating looks and how well it sets.
- White chocolate or candy melts: Perfect for ghosts and mummies, as they create a bright surface for decorating.
- Orange candy melts: Give the pumpkin look without needing food coloring.
- Dark or milk chocolate: Great for striped designs and base coats with contrasting drizzle.
- Tip: Add a little coconut oil or shortening when melting to keep the chocolate glossy and smooth.
Can I Use Food Coloring In Chocolate For Halloween Decorations?
Food coloring can be tricky with chocolate, but there are safe ways to add color if candy melts aren’t available.
- Oil-based coloring: Always choose oil-based food coloring because water-based colors can cause chocolate to seize.
- Mix slowly: Add a tiny amount at a time until you reach the desired color.
- Alternative option: Use already colored candy melts to save time and avoid texture problems.
How Do I Stop The Chocolate From Cracking Or Falling Off The Strawberries?
This is a common issue, but it can be avoided with the right preparation.
- Dry thoroughly: Even a drop of water on the strawberry will stop chocolate from sticking.
- Room temperature strawberries: Cold strawberries cause chocolate to harden too quickly and crack. Keep them at room temperature before dipping.
- Proper dipping: Dip and gently shake off the extra coating instead of wiping or scraping the strawberry against the bowl.
Can I Use Different Decorations For Halloween Chocolate Covered Strawberries?
Yes, you can get creative and make endless designs beyond pumpkins, ghosts, and mummies.
- Sprinkles: Add orange, black, or green sprinkles before the chocolate sets for a festive touch.
- Colored drizzle: Use purple or green candy melts to create monster or witch-themed strawberries.
- Candy add-ons: Mini marshmallows, tiny candy hats, or edible glitter can make them even more eye-catching.
Adding variety makes the platter more exciting, especially for kids.
How Long Do Halloween Chocolate Covered Strawberries Last?
The shelf life of these strawberries is short because of the fresh fruit inside.
- In the refrigerator: They last up to 48 hours if stored properly.
- Best for serving: Within the first 24 hours for peak freshness and appearance.
- Not freezer-friendly: Freezing changes both taste and texture, so it’s best to avoid.
You May Also Like To Check Out These Recipes
- Crustless Pumpkin Pie
- Pumpkin Cream Cheese Muffins
- Baked Cinnamon Apples
- Oven Roasted Sweet Potatoes Wedges
- Roasted Sweet Potato Black Bean Bowl
- Pumpkin Pie Cookies
- Pumpkin Chocolate Chip Cookies
- Halloween Pumpkin Cake
- Creamy Pumpkin Soup With Roasted Seeds
- Soft & Fluffy Pumpkin Chocolate Chip Muffins
- Sweet Potato Casserole With Marshmallows
- Homemade Pumpkin Pie
- Decorated Pumpkin Shaped Cookies
- Mini Pumpkin Cheesecakes
- Pumpkin Cake With Cinnamon Cream Cheese Frosting
- Starbucks Pumpkin Cream Cheese Muffins
- Easy Tres Leches Cake With Box Mix
- Old-Fashioned Date Cake
- Funnel Cake
- Green Cake
- Vegan Apple Cake
- Delicious Sunset Cake
- Moist Plum Cake
- Under The Sea Cake With Ocean Decorations
- Jack Nightmare Before Christmas Cake
- Halloween Charcuterie Board
- Halloween Fruit Platter
- Halloween Veggie Tray
- Halloween Chocolate Bark
- Halloween Cookie Cake
- Halloween Graveyard Dirt Cake
- Halloween Eyeball Pizza
- No Bake Cheesecake Without Cream Cheese
- Halloween Cake Pops