Every October, I look forward to pulling out the cake stand and filling it with little treats that make kids’ eyes light up.
Out of all the bakes I’ve done through the years, Halloween cake pops are always the first to disappear.
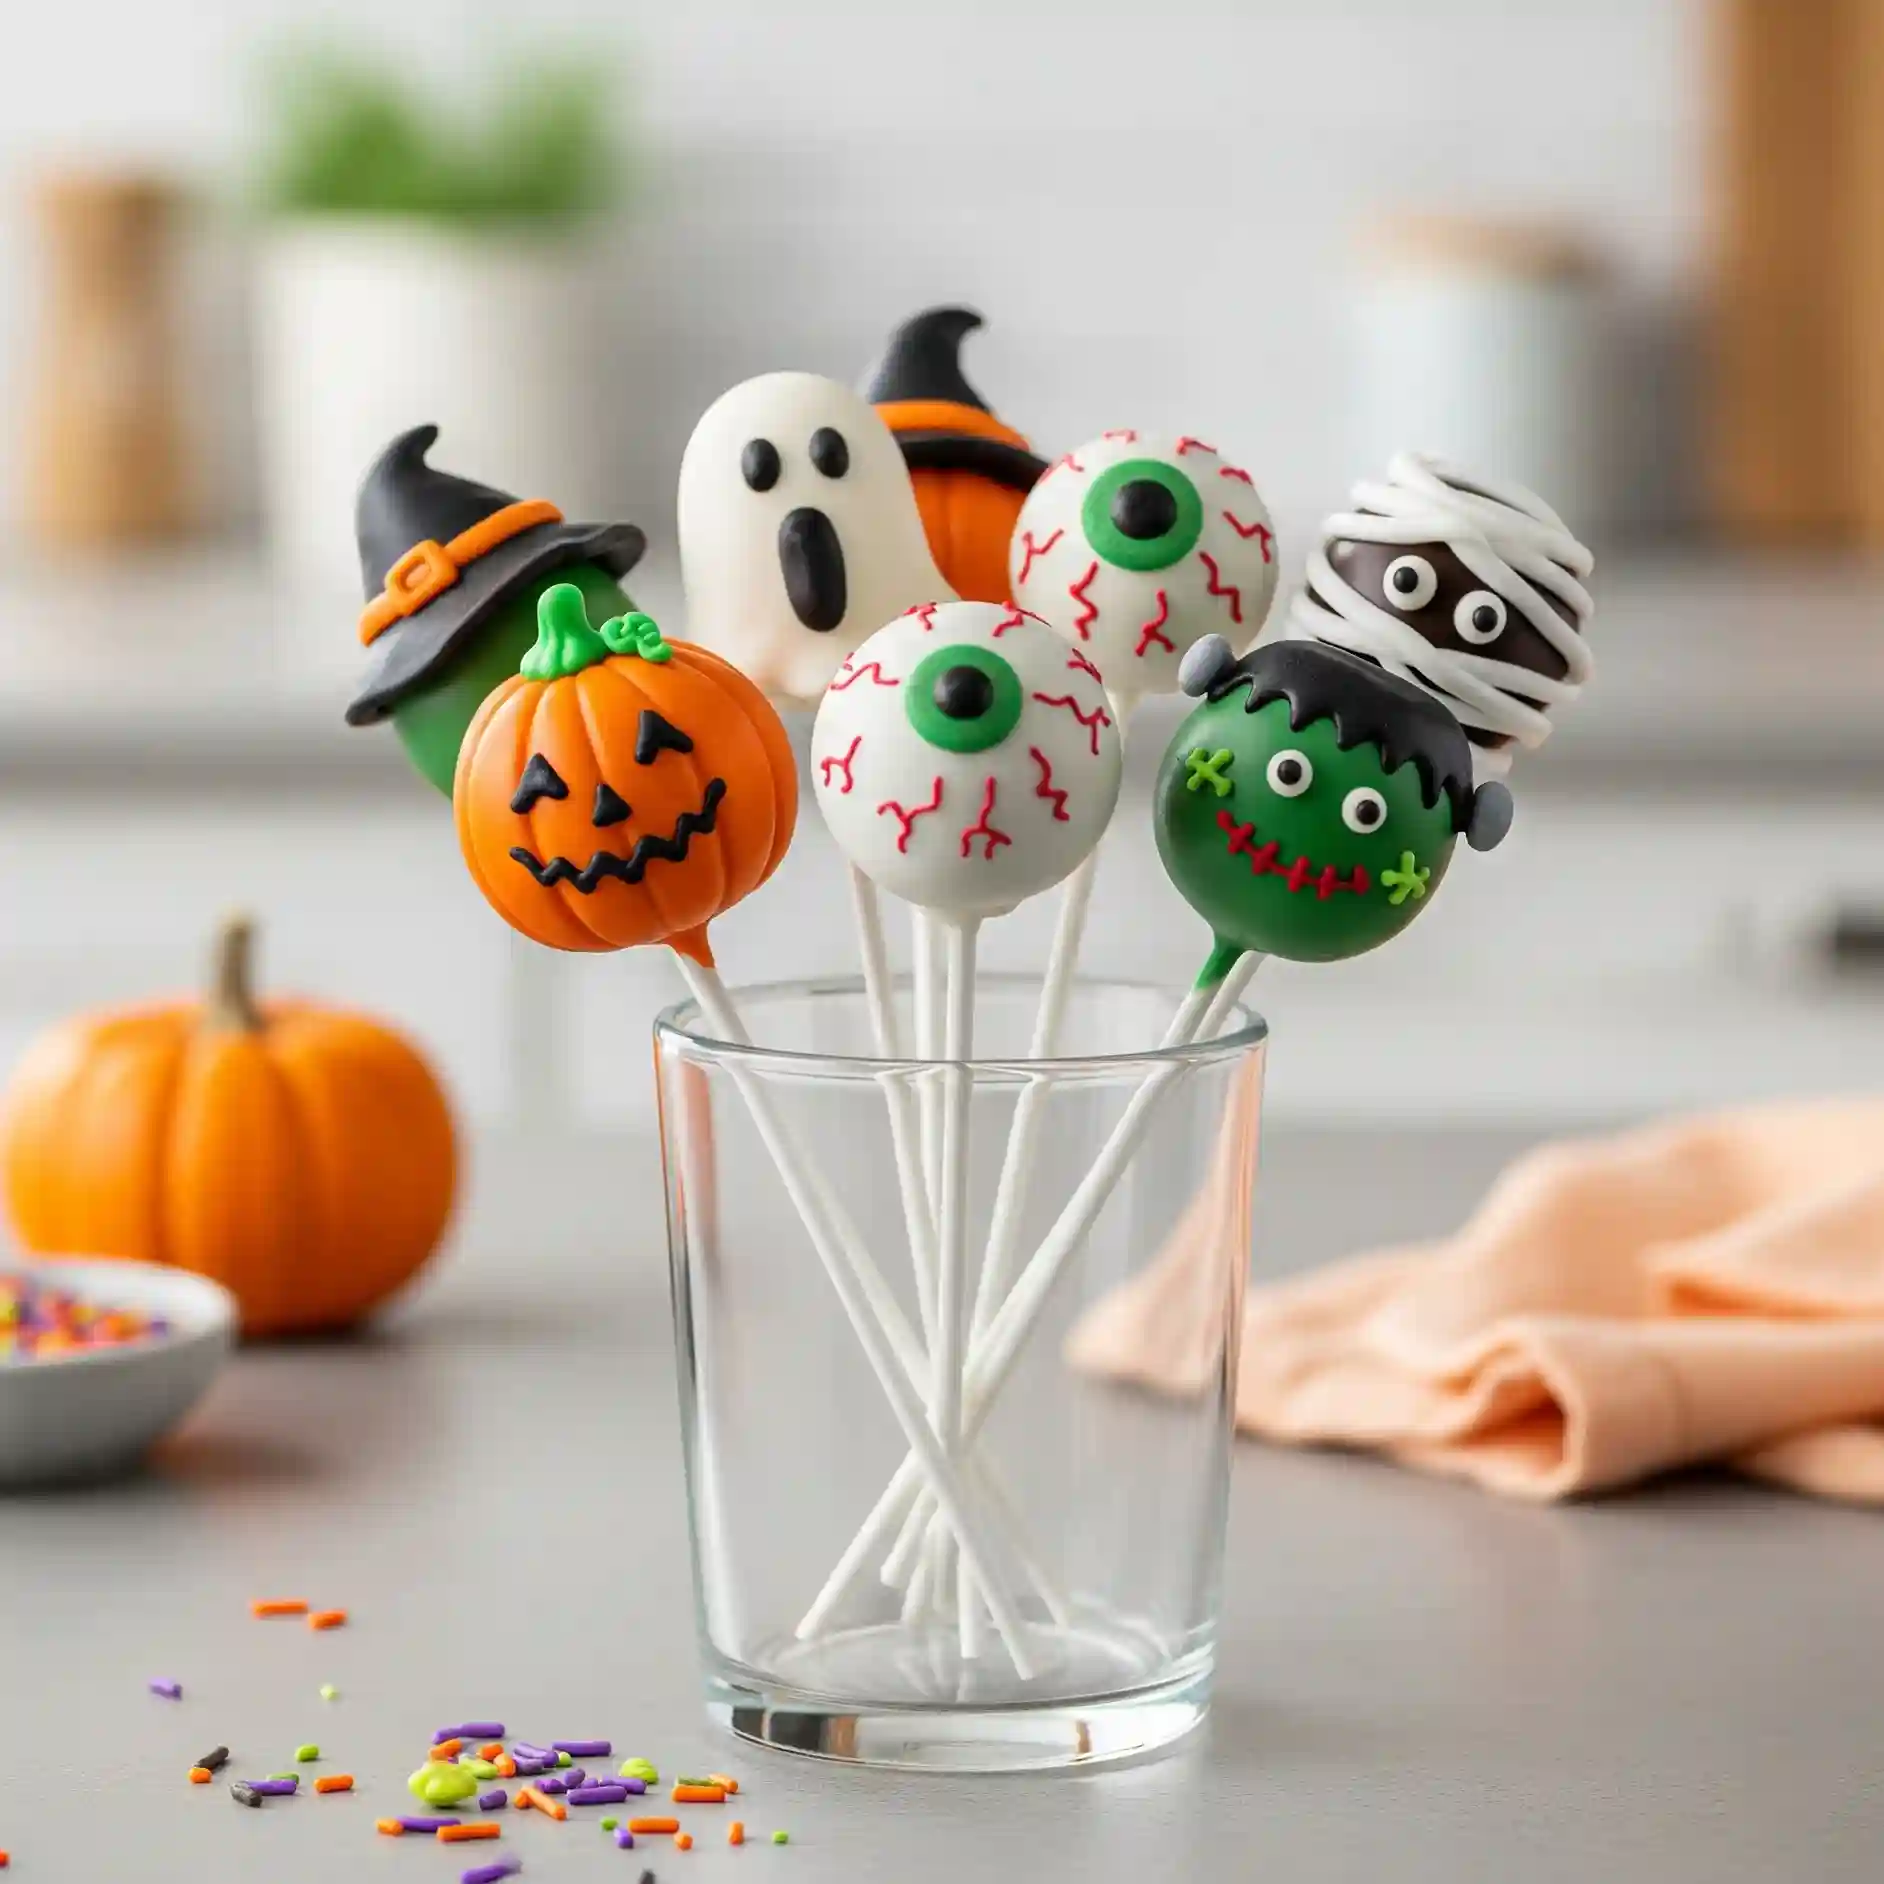
There’s just something about seeing a tray of tiny pumpkins with toothy grins, mummies wrapped in chocolate bandages, and goofy green Frankensteins on sticks that makes both children and adults stop and smile before taking a bite.
These pops may be small, but they turn the whole kitchen into a workshop of laughter and sticky fingers.
I remember dipping the first batch and realizing how decorating them felt more like arts and crafts than baking—except at the end, you get to eat the project.
It’s a treat that doesn’t just taste good; it sparks stories, giggles, and a little friendly competition over who can make the scariest ghost or the funniest monster face.
Each pop is built on the same base of moist cake and frosting, but the decorations are what give them personality.
One by one, they transform into playful characters that are almost too cute to eat—until you take that first bite of rich cake inside the crisp shell of chocolate. That’s when you know the effort was worth it.
Halloween Cake Pops Recipe
Ingredients
- 1 box vanilla or chocolate cake mix (plus ingredients listed on the box such as eggs, oil, and water)
- 1 ½ cups vanilla frosting (homemade or store-bought)
- 2 cups white candy melts
- 1 cup orange candy melts
- 1 cup green candy melts
- 1 cup black candy melts
- 1 cup milk chocolate candy melts
- 1 cup red candy melts
- 1 teaspoon vegetable oil (optional, to thin candy melts if too thick)
- Black decorating gel or edible marker
- Assorted sprinkles and edible decorations (mini candy eyes, orange sprinkles, etc.)
- Lollipop sticks
Instructions
- Bake the cake according to the package directions. Let it cool completely.
- Crumble the cooled cake into a large bowl until it has a fine, sand-like texture.
- Mix in frosting a little at a time until the mixture holds together when pressed. You should have a soft but moldable dough.
- Scoop out tablespoon-sized portions and roll them into smooth balls. Place them on a parchment-lined tray.
- Chill the cake balls in the refrigerator for 1–2 hours or in the freezer for 20 minutes until firm.
- Melt your chosen candy melts in separate bowls according to package instructions. If too thick, stir in a small amount of vegetable oil.
- Dip the tip of each lollipop stick into melted candy, then insert it halfway into each cake ball. This helps secure the stick.
- Working one at a time, dip each cake ball fully into the melted coating, gently tapping off excess. Stand the pops upright in a foam block or sturdy holder to dry.
- For pumpkins: Dip in orange candy melts, draw faces with black decorating gel, and add a small green stem with green melts.
- For ghosts: Dip in white candy melts, then draw two black eyes and a mouth with gel or edible marker.
- For eyeballs: Dip in white candy melts, pipe a circle of green melts for the iris, add a candy eye in the center, and use red melts to draw squiggly lines as veins.
- For Frankenstein: Dip in green melts, add black hair with black melts, attach candy eyes, and pipe a red stitched mouth.
- For mummies: Dip in white melts, then drizzle extra lines across to create a wrapped effect. Attach candy eyes before the coating sets.
- For witch hats or details: Use black melts to shape hats, then add orange bands or small features with orange melts.
- Let all pops dry completely at room temperature before serving or packaging.

What Type Of Cake Works Best For Halloween Cake Pops?
The base of your cake pops decides how moist, flavorful, and sturdy they turn out. Not every cake texture holds its shape well once mixed with frosting.
- Dense cakes hold shape better: Chocolate, red velvet, and pound cake create a strong base that won’t crumble too easily.
- Avoid overly moist cakes: Angel food or sponge cake can become too soft when mixed with frosting, making it hard to roll into balls.
- Use fully cooled cake: Warm cake crumbles unevenly and may melt the frosting, so always let it cool before starting.
How Much Frosting Should Be Added To Cake Pops?
Balancing the cake and frosting mixture is important to avoid pops that are too sticky or too dry.
- Add gradually: Start with a few spoonfuls of frosting and mix with the cake crumbs before adding more.
- Check texture with your hands: The mixture should hold together easily when pressed but not feel wet.
- Avoid excess frosting: Too much will make the cake pops heavy and hard to coat smoothly.
How To Stop Cake Pops From Falling Off The Stick?
Many beginners struggle with cake pops sliding off sticks, but small adjustments make a big difference.
- Dip stick in melted coating first: This creates a glue-like seal when inserted into the cake ball.
- Chill before dipping: Cold cake pops stay firm and less likely to break apart.
- Do not overload with coating: A thin, even dip works better than a thick layer that adds extra weight.
What Is The Best Way To Decorate Halloween Cake Pops?
Decorating is where the fun begins, but having the right approach makes it easier.
- Work in stages: Coat all cake pops first, let them dry, and then move to adding details.
- Use separate bowls of melted chocolate: Different colors like green, orange, black, and white should be ready before starting.
- Add details while coating is wet: Candy eyes, sprinkles, or small chocolate pieces stick better when the coating hasn’t set yet.
- Pipe fine lines for details: For stitches, spider webs, or mummy wraps, use a piping bag with melted chocolate.
Can Cake Pops Be Made Ahead Of Time?
Halloween parties can get busy, so preparing cake pops in advance is a huge help.
- Undecorated cake balls: These can be made and stored in the freezer for up to a month. Thaw them in the fridge before dipping.
- Coated cake pops: They stay fresh for up to a week if stored in the refrigerator.
- Freshest results: For the best texture, decorate them within two days of serving.
How Should Halloween Cake Pops Be Stored?
Storage affects both the taste and appearance of cake pops. Handle them carefully to keep them looking just as good as when decorated.
- Room temperature storage: Keep in an airtight container for up to 3 days if your kitchen isn’t too warm.
- Refrigeration: Store in a covered container with parchment between layers to avoid sticking. They last about 7 days this way.
- Freezing: Undecorated cake balls can be frozen, but fully decorated pops may lose their smooth look after thawing.
- Avoid moisture buildup: Condensation from the fridge can make the chocolate coating sticky, so allow them to come to room temperature before serving.
How To Transport Halloween Cake Pops Safely?
Taking cake pops to a party or school event requires a little planning so they don’t smudge or break.
- Use a sturdy base: A foam block or cake pop stand keeps them upright.
- Wrap individually: Place each pop in a small plastic bag tied with ribbon to protect the decorations.
- Keep cool during travel: If driving in warm weather, use a cooler bag with ice packs to prevent melting.
Common Mistakes To Avoid When Making Halloween Cake Pops
Even the most creative cake pops can go wrong if a few small details are missed. Here are the most common mistakes and how to avoid them so your Halloween cake pops turn out smooth, neat, and delicious.
- Using warm cake crumbs: If the cake is even slightly warm, it will melt the frosting and turn into a sticky mess. Always let the cake cool completely before crumbling.
- Adding too much frosting: While it might seem like more frosting makes them creamier, it actually makes the mixture too soft and hard to shape. Start with a little and test as you go.
- Skipping the chilling step: If cake balls are not firm before dipping, they will fall apart in the melted coating. Always chill for at least 20 minutes in the freezer or 1–2 hours in the fridge.
- Overheating candy melts: High heat can make candy melts seize or become too thick. Melt slowly in the microwave in short bursts, stirring in between.
- Dipping too quickly: Dropping the cake ball straight into the melted coating can cause it to crack or slide off the stick. Gently dip, swirl, and tap off the extra coating.
- Decorating before coating sets: Adding details too soon can cause them to slide off. Wait until the first layer is dry before piping or sticking on decorations.
- Storing incorrectly: Leaving cake pops uncovered in the fridge makes them dry out. Always store in an airtight container or wrap individually for freshness.
Expert Pro Tips For Perfect Halloween Cake Pops
These pro-level tips make the difference between average cake pops and ones that look polished, smooth, and party-ready. Even small tweaks can give you bakery-quality results right at home.
- Use a cookie scoop for uniform size: Scooping equal portions keeps all cake balls the same size, which helps them dip evenly and look neat.
- Thin candy melts when needed: If the coating feels too thick, stir in a teaspoon of vegetable oil until it flows smoothly. This prevents clumps and streaks.
- Tap gently to remove excess coating: After dipping, hold the pop at an angle and tap your wrist (not the stick) to shake off extra coating without loosening the ball.
- Work with chilled but not frozen pops: If they are rock solid, the coating may crack when it hardens. Slightly chilled is best for a smooth finish.
- Decorate with piping bags or squeeze bottles: These tools give you cleaner lines for stitches, mummy wraps, or spider webs compared to using a spoon or fork.
- Plan colors in advance: Melt and prepare all the candy coatings before dipping so you can move quickly without stopping in between.
- Dry pops upright: Place them in a foam block or cake pop stand as they set. This keeps the coating smooth and prevents flat spots.
- Keep hands clean while decorating: Wipe off extra coating often so smudges and fingerprints don’t ruin the finished look.
You May Also Like To Check Out These Recipes
- Crustless Pumpkin Pie
- Pumpkin Cream Cheese Muffins
- Baked Cinnamon Apples
- Oven Roasted Sweet Potatoes Wedges
- Roasted Sweet Potato Black Bean Bowl
- Pumpkin Pie Cookies
- Pumpkin Chocolate Chip Cookies
- Halloween Pumpkin Cake
- Creamy Pumpkin Soup With Roasted Seeds
- Soft & Fluffy Pumpkin Chocolate Chip Muffins
- Sweet Potato Casserole With Marshmallows
- Homemade Pumpkin Pie
- Decorated Pumpkin Shaped Cookies
- Mini Pumpkin Cheesecakes
- Pumpkin Cake With Cinnamon Cream Cheese Frosting
- Starbucks Pumpkin Cream Cheese Muffins
- Easy Tres Leches Cake With Box Mix
- Old-Fashioned Date Cake
- Funnel Cake
- Green Cake
- Vegan Apple Cake
- Delicious Sunset Cake
- Moist Plum Cake
- Under The Sea Cake With Ocean Decorations
- Jack Nightmare Before Christmas Cake
- Halloween Charcuterie Board
- Halloween Fruit Platter
- Halloween Veggie Tray
- Halloween Chocolate Bark
- Halloween Cookie Cake
- Halloween Graveyard Dirt Cake
- Halloween Eyeball Pizza
- No Bake Cheesecake Without Cream Cheese